If you own a BMW E92 or E93, you may experience issues with a trunk tail light. One common issue is that the lower part of the taillight does not light up. This issue can be frustrating because there is no light bulb that you could just change. Furthermore, the taillight is expensive, and the only option that the dealer offers is to replace the light assembly. This pleasure will set you back $150, and this does not even include the labor cost for replacing the rear light. But don’t lose hope and read on because this tail light is relatively easy to fix yourself. In this blog, we will guide you through the steps on how to fix a BMW E92 or E93 tail light.
X-ray the tail light
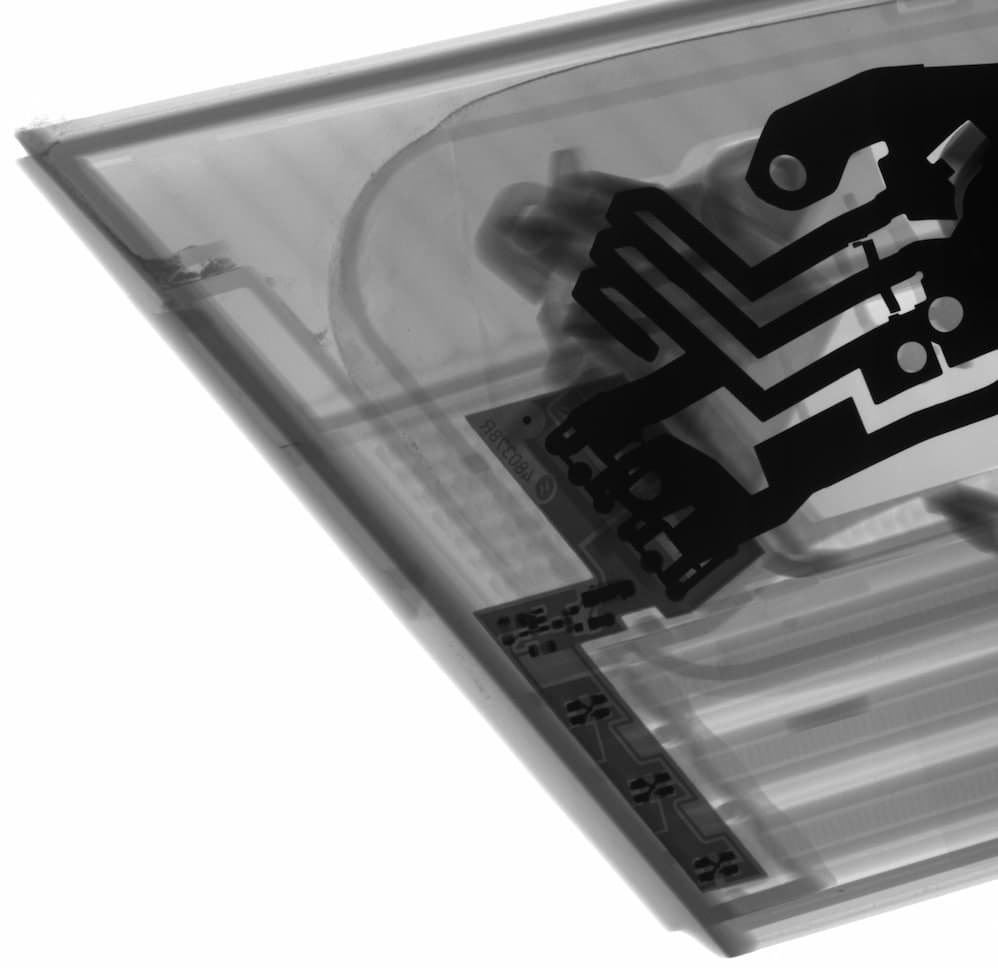
Of course, not everyone has an X-ray machine at home, and I am no exception. But a good friend of mine has one. So I asked him for help. Together, we x-rayed the taillight and discovered that it had a printed circuit board (PCB) hiding inside. The image we saw when we x-rayed the taillight is shown in Figure 1.
How to disassemble the tail light
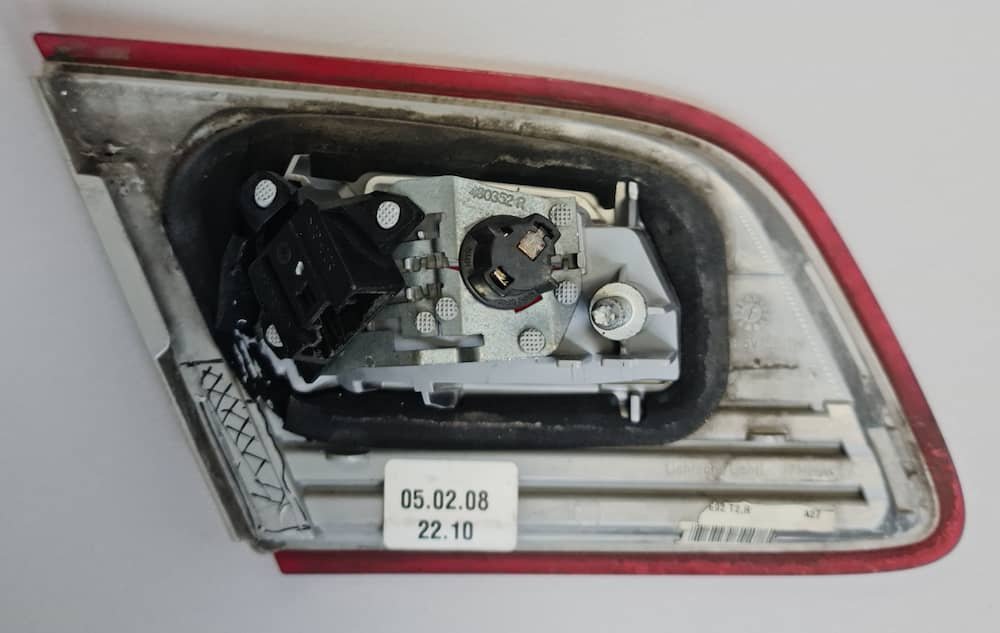
This taillight is designed so that it cannot be disassembled. The lamp, as shown in Figure 2, has no screws and is completely sealed with plastic.
In order to access the printed circuit board and fix the tail light, we must first disassemble it. We used a scalper to cut around the edges of the lamp (Figure 3). A sharp knife can be used too.

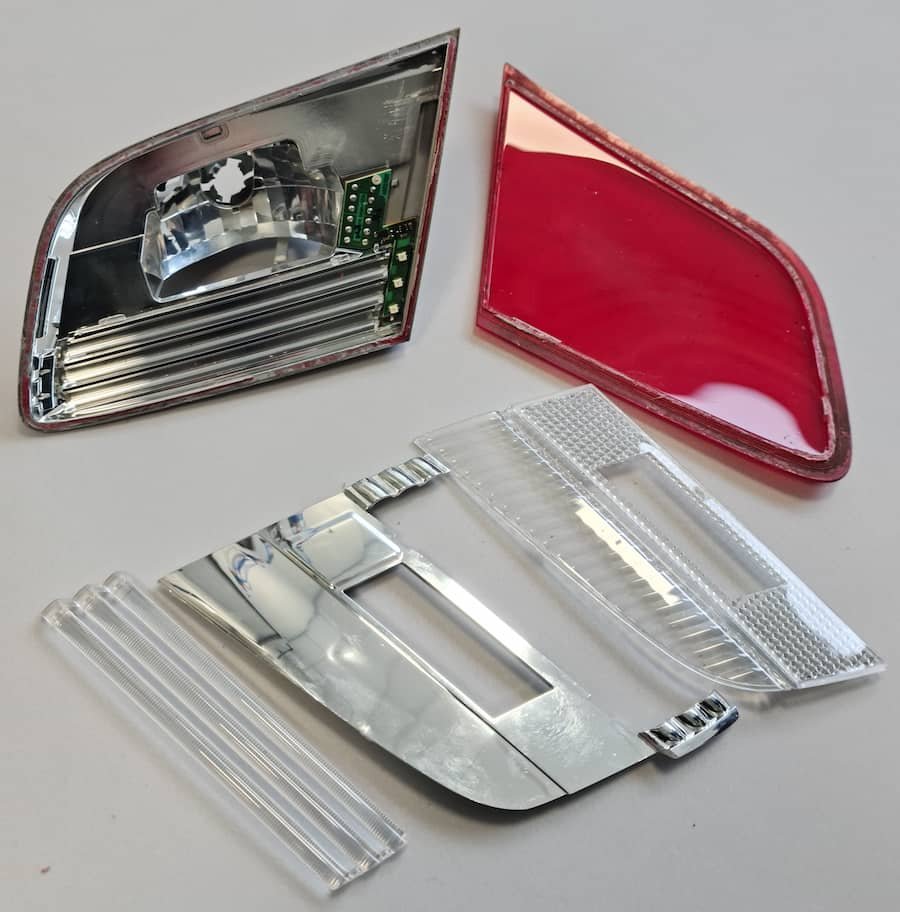
Be careful not to cut too deep or damage any of the internal components inside the lamp. Once we had cut all the way around, we were able to remove the red plastic lens. Inside the lamp, there is a reflector and three plastic rods for the distribution of LED light through the lamp (Figure 4).
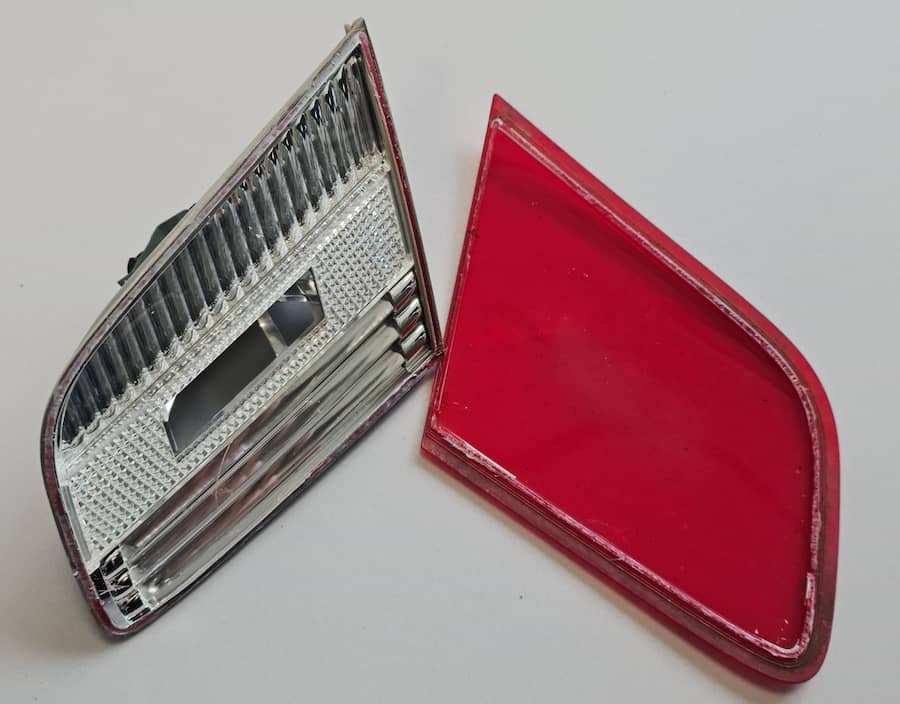
We then carefully, using a little force, removed all the plastic parts and set them aside. All parts inside the taillight are shown in Figure 5.
Tail light LED repair
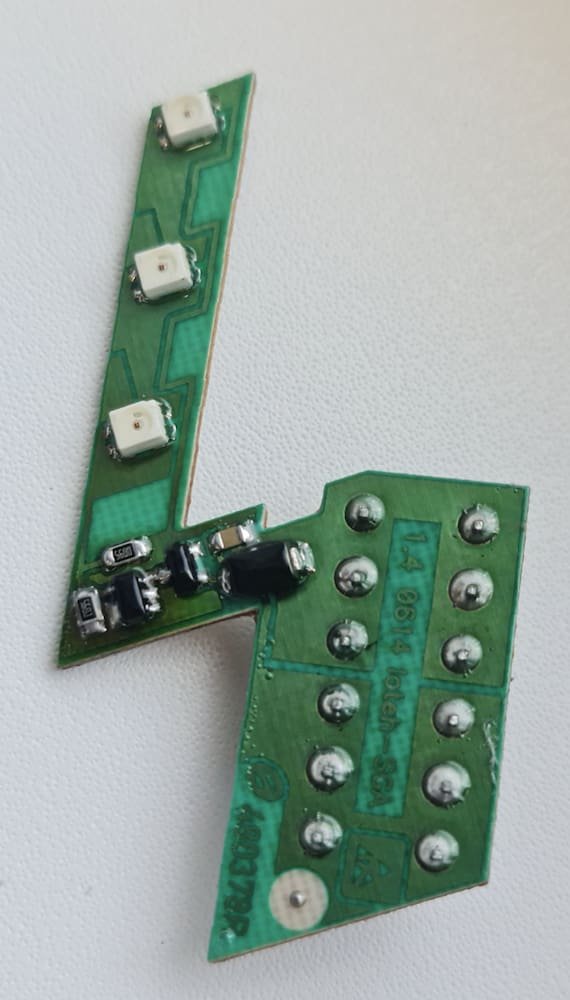
Now we can move on to the PCB. After removing the PCB from the lamp, we noticed that the solder joints on the PCB are heavily oxidized. It looks like that water got inside the lamp and damaged the PCB. Figure 6 shows the oxidation of the solder on the PCB pads.
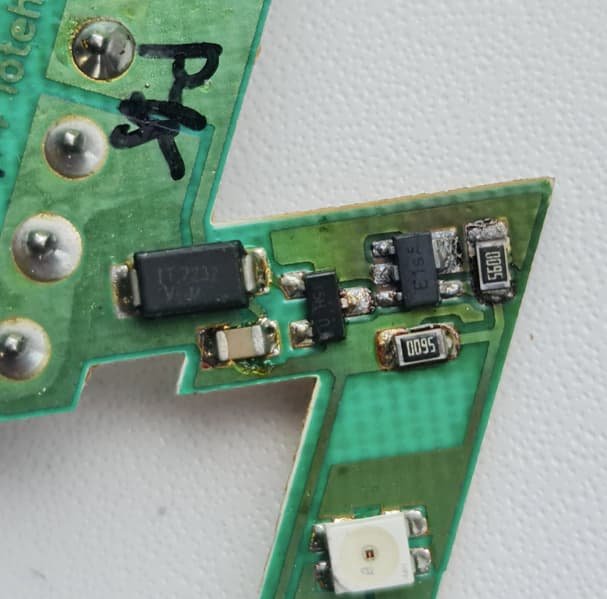
We tested the LEDs and found them to be functional. Therefore, we concluded that the circuit is not working because there are no contacts between the oxidized pads and the components. We resoldered all the electrical connections. You may compare Figures 7 and 6 to see how the oxidized pads differ from the resoldered ones.

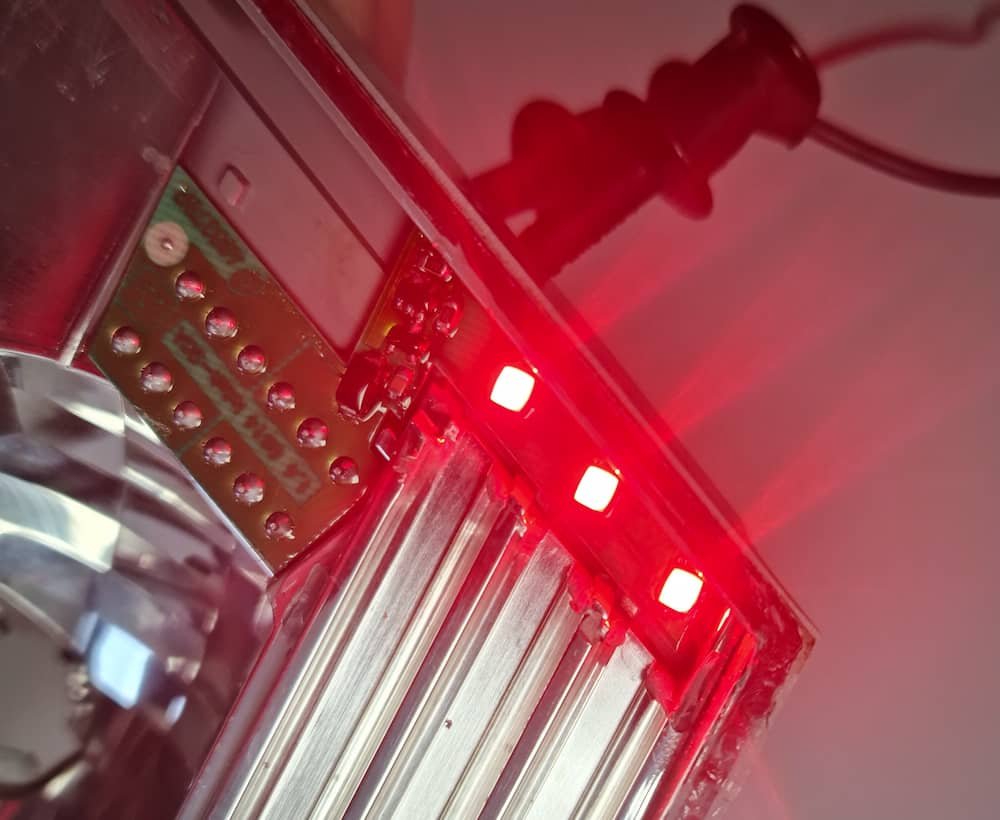
After that, we tested the board, and voila, it works again. When 12V is connected to the contacts, three LEDs light up, as shown in Figure 8. Next, we will discuss ways to avoid further corrosion.
Preventing further corrosion
To protect the board from further corrosion and prevent future failures, we sprayed a layer of clear lacquer over the internal components. The lacquer will protect the board from further corrosion caused by moisture. We should note that the lacquer must be a special circuit board lacquer.
Assembling the tail light
After spraying the board with lacquer and allowing it to dry, it is time to reassemble the lamp. Start by putting the reflector and other parts back in place. Then glue the red outer lens using a dual-component glue. This glue provides a strong and durable bond that will ensure the glass will stay securely in place. Be sure to follow the instructions on the glue carefully to ensure a proper bond. The completely assembled tail light is shown in Figure 10.

Summary
In conclusion, while fixing a broken taillight on a BMW e92 or e93 may initially seem difficult, it is a task that is achievable with the right tools and knowledge. You can repair your tail light to get it back to working condition by following the provided steps in this blog. With a little patience and persistence, you can get your BMW back on the road with fully functional tail lights.