STM32CubeIDE is a powerful and user-friendly Integrated Development Environment (IDE) for developing and debugging STM32 microcontroller applications. It provides a wide range of features and tools to help developers create high-performance and efficient STM32-based applications. One of the advantages of the STM32CubeIDE is its ability to connect to a Github repository, allowing developers to easily share and collaborate on their code. In this post, we will look at how to use STM32CubeIDE with Github. STM32CubeIDE is based on Eclipse. Therefore, you will also learn how to use Eclipse with Github.
What is the difference between Git and Github?
Git is a version control system, a tool that tracks changes made to files. It is used for software development and other version control tasks. GitHub is a hosting service for Git repositories.
It provides a web-based interface to interact with Git repositories, as well as additional features such as issue tracking, pull requests, and project management.
Why use Github?
Using Github in conjunction with an STM32CubeIDE may significantly improve your workflow and productivity as a developer. By connecting your IDE to Github, you can easily track changes to your code, collaborate with other developers, and manage different versions of your project. Furthermore, using Github allows you to easily share your work with others, making it an excellent platform for open-source development.
Github integration for STM32CubeIDE
First of all, you need to sign in to GitHub. If you do not have a GitHub account, you will need to create one.
To create a GitHub account, go to GitHub.com and click on the “Sign up” button. Fill in the required information, including your email address and a password. Click on the “Create account” button. Verify your email address by entering the code that was sent to your email. Sign in to your new GitHub account.
Creating a repository in Github
To create a repository on GitHub, sign in to your account and click the “+” button in the upper right corner of the screen, then select “New repository.” You will now be brought to a new window (Figure 1), where you need to provide information about the repository.
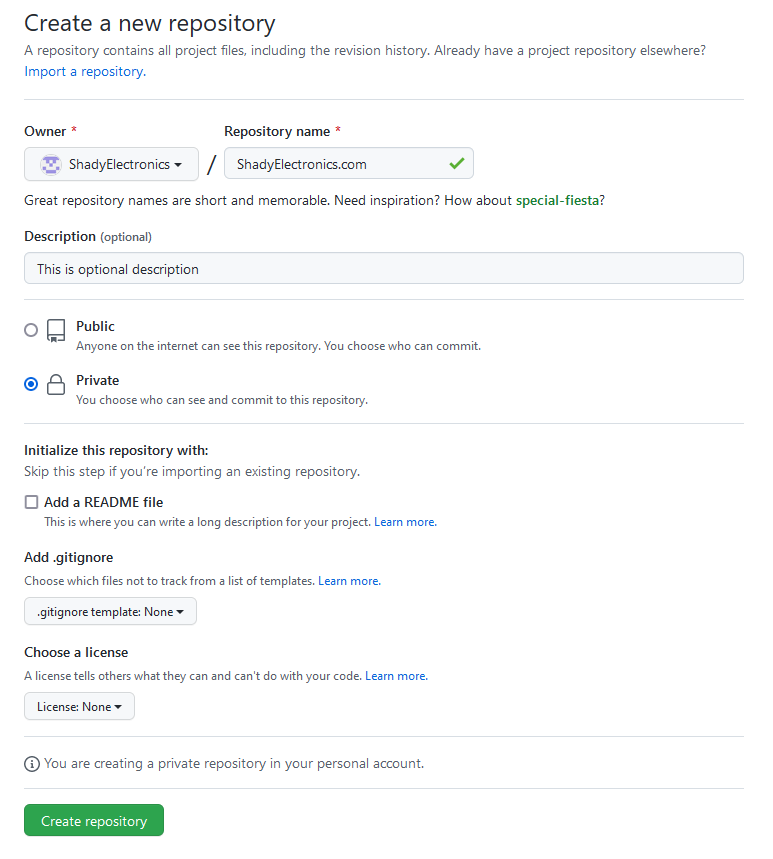
Enter a name and optionally a description for your repository, and choose whether it should be public or private. To complete the creation of your repository, click the “Create repository” button.
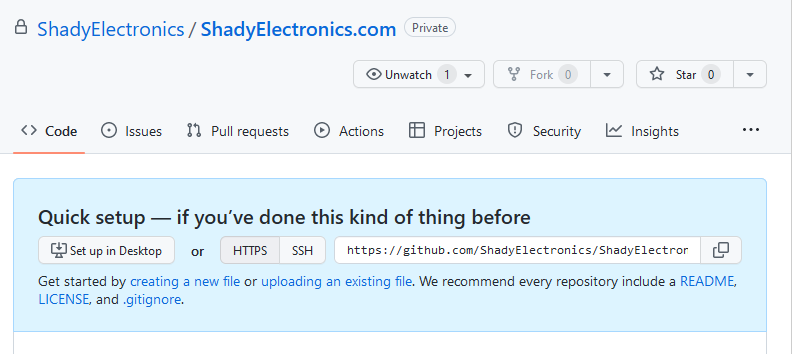
Following repository creation, you will be taken to another window with the Quick Setup field (Figure 2). This field contains a URL that you will need to use later to clone this repository.
How to generate a Github token
This section explains the Github token, which will be required later. A GitHub token is a secure way to access the GitHub API or to authenticate to GitHub when using the command-line interface. Tokens can be generated for specific purposes, such as authenticating to the GitHub API, and can be revoked at any time. Tokens are typically used instead of a password when interacting with the GitHub API or command-line interface, as they can be easily revoked if they are compromised.
To generate a GitHub token, log in to your GitHub account and go to the “Settings” page. Here, on the left sidebar, select “Developer Settings”. Then under “Personal access tokens,” choose “Tokens (classic)” and click “Generate new token (classic).” Write a note about the token and select an expiration time. Then, choose the scopes to which you wish to provide access. Click “Generate token” and store it somewhere secure because it will only be displayed once and cannot be recovered afterwards.
Connecting the STM32CubeIDE project to Github
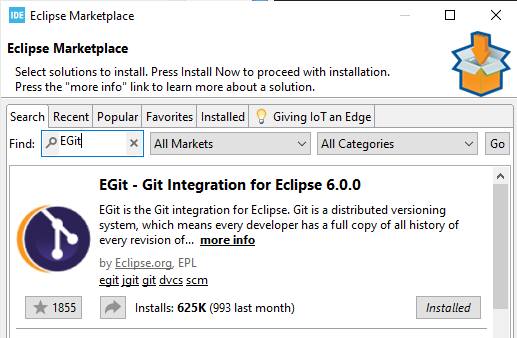
To connect STM32CubeIDE to a GitHub repository, you’ll need to install the EGit plugin in STM32CubeIDE. This can be done through “Eclipse Marketplace,” which you can find in the “Help” menu. In the marketplace, search for EGit and install it (Figure 3). Restart STM32CubeIDE once the installation is complete.
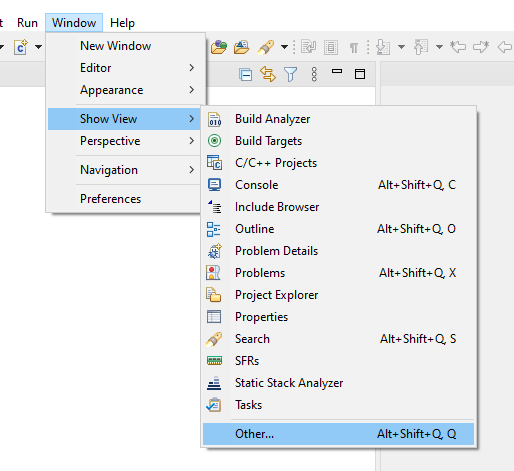
Now, like in Figure 4, navigate to the “Window” menu, then “Show View,” and finally “Other.” Select “Git” from the options that appear and click on “Git Repositories.”
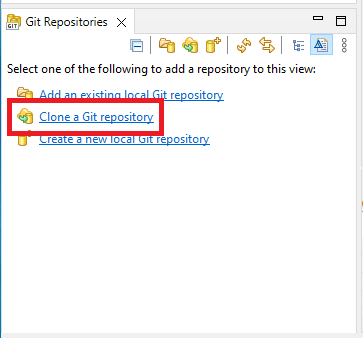
The Git Repositories view will appear, with the option to clone a repository (Figure 5). When you select this option, a new window will appear, as shown in Figure 6.
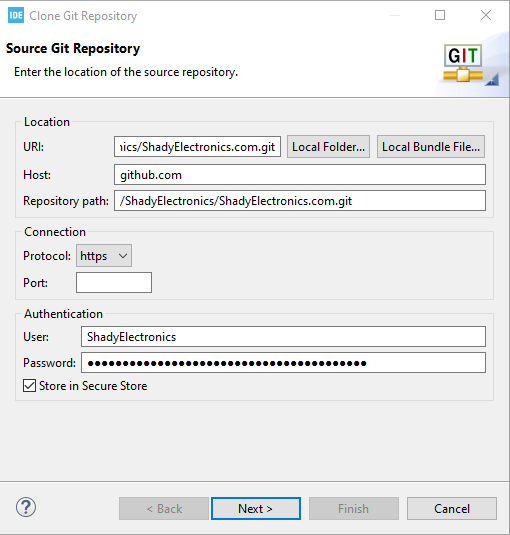
Remember the URL I mentioned you’d need later? This is where you’re going to use it. Paste the URL from the Github repository that you created earlier into the “Clone git repository” window. Enter your Github login in the “Authentication” field. There is an issue with the “Password” field. Here, your Github password is not enough. You will need to create a token. This token will be used as a password. We discussed how to generate it earlier. So create a token in your Github account. After you enter the token in the password field, you’ll need to click the “Next” button a few times. Then choose the directory destination and press “Finish.”
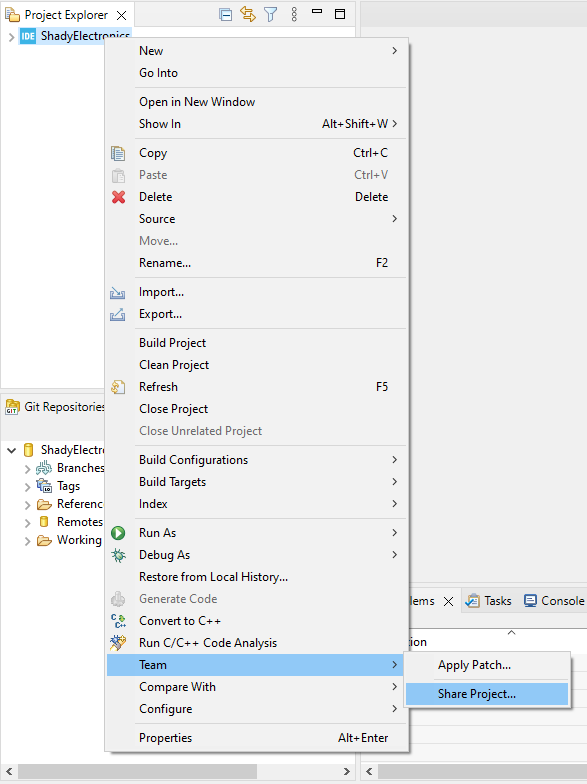
Nice! You have finally linked the Github repository with the STM32CubeIDE. Now you are almost ready to commit a project to GitHub using the STM32CubeIDE. First, open the project you want to commit. Right-click the project, navigate to the “Team” menu, and select “Share Project” (Figure 7). Enter your GitHub credentials and select the repository you just created. Click “Finish” to link the repository to your project.
Gitignore file for STM32CubeIDE
It is a good idea to add a.gitignore file before committing the project. A .gitignore file is used to prevent Git from tracking specific files or directories. This is useful for files that are specific to a particular environment or files that are generated during the build process but are not necessary for the project to function properly.
The .gitignore file is typically created in the root directory of a Git repository. The .gitignore file should be committed to the repository along with the other project files. For STM32CubeIDE you can copy the text below and paste it to the .gitignore file.
#settings
.settings/

#metadata
.metadata/

#Debug
Debug/
debug/
Release/
release

# Prerequisites
*.d

# Object files
*.o
*.ko
*.obj
*.elf

# Linker output
*.ilk
*.map
*.exp

# Libraries
*.lib
*.a
*.la
*.lo

# Shared objects
*.dll
*.so
*.so.*
*.dylib

# Executables
*.exe
*.out
*.app
*.i*86
*.x86_64
*.hex
*.bin

# Debug files
*.dSYM/
*.su
*.idb
*.pdb
Committing project to repository
Go to the “Team” menu again and select “Commit.” The Git staging window will be opened (Figure 8).
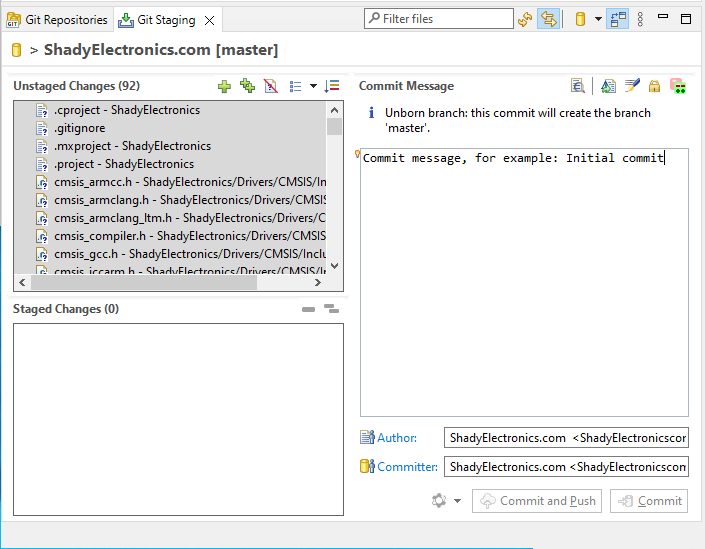
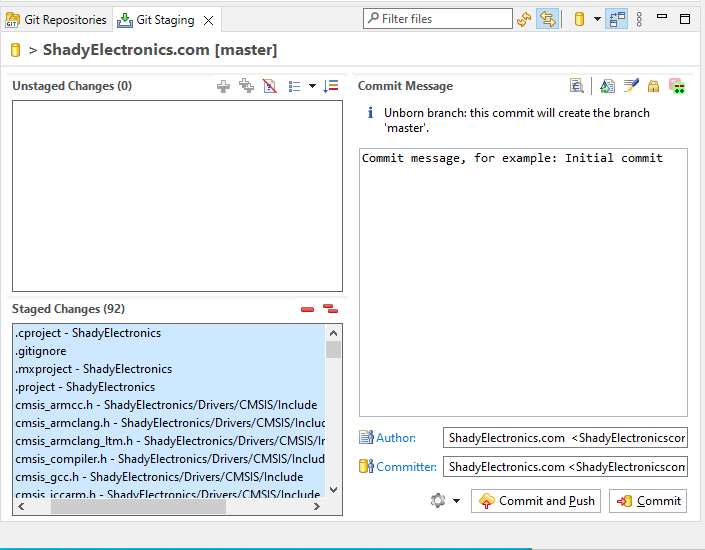
Move unstaged changes into staged changes. This can be done by pressing the double “+” button or by dragging and dropping files from unstaged to staged fields. Now enter a commit message. And you should see something similar to Figure 9.
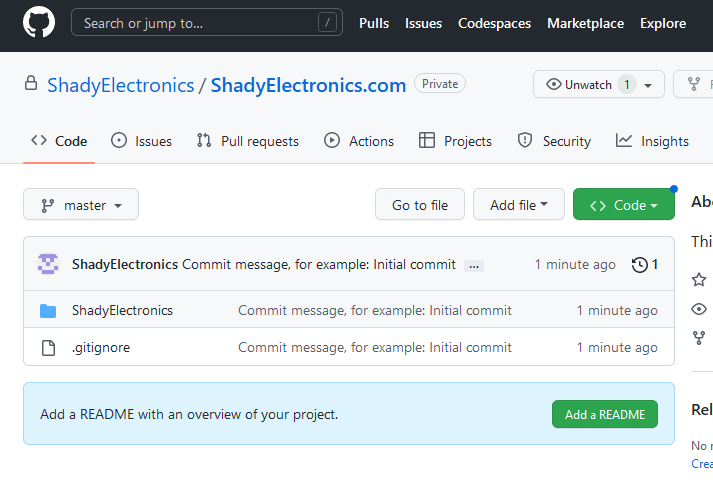
You may now press the “Commit and Push” button. This will push the modifications to the remote repository. Now check your Github repository, and you should find files that you pushed. Figure 10 is an example of what it should look like.
Push and pull to Github
To push changes to GitHub, follow the steps outlined in the previous section. Select “Commit” from the “Team” menu, then type a commit message and click “Commit and Push.” This will upload the changes to the GitHub repository.
To pull changes from GitHub, go to the “Team” menu and select “Pull.” Changes from GitHub will be downloaded and merged with the local project. A new window will pop up that shows results for the pull action. Close the window by pressing the “Close” button.
Summary
In this blog post, we discussed how to use the STM32CubeIDE and GitHub together for your next project. We covered the steps to connect a STM32CubeIDE project to a GitHub repository. We also discussed how to commit and push changes to a remote repository. By following this tutorial, you should now have a good understanding of how to use the STM32CubeIDE and GitHub to effectively manage your code.